A new roof is a system, not only a covering
When building a house, the roof is the stage that closes the building from above and provides the primary protection of interior spaces from rain, wind and sunlight. It is often viewed mainly as the visible rows of tiles. In practice, tiles are only one element. Beneath them are a supporting structure, layers that direct any water that gets through, a ventilated space, a supporting batten system and many details that guide water away from the building.
A properly built roof works as an interconnected system. The slope determines how water runs towards the eaves. The structure transfers loads to the building. The under-roof layer protects the space below the covering, while counter-battens and battens create the correct base for the tiles. Flashings around interruptions in the roof plane and drainage at the eaves complete the path of water.
For this reason, new roof construction should not be organized as a sequence of unrelated operations. Materials, profiles, fixings and details need to be compatible with the design solution and the specific geometry of the house. More complex forms with valleys, dormers, chimneys, terraces or wall connections require even closer coordination because larger quantities of water collect and are directed through these transitions.
Design, shape and preparation before installation
Construction begins with a clear understanding of the design solution. It defines the roof shape, slopes, supporting scheme, locations of chimneys and other penetrations, eaves, ridge lines and valleys. With a single-pitched or gable roof, the water path is generally easier to follow. With hip and multi-pitched roofs, the number of intersections and critical details increases, so every water collection and drainage line needs to be clarified in advance.
Before the roof structure starts, it is important to check the readiness and geometry of the base on which it will sit. The levels of the slab or supporting walls, the positions of supports and openings, and the connections with chimneys and parapets affect the accuracy of later installation. A deviation that looks minor at the beginning can make it difficult to align planes, eaves, battens and the roof covering.
At this stage, all elements that will penetrate or meet the roof should also be defined. They may include chimneys, ventilation outlets, roof windows, dormers, antennas or other installation solutions. When their locations are decided after the covering has already been laid, finished layers often need to be opened. Advance planning makes it possible to include the required flashings and connections as part of the system.
It is useful to have clarity on the following questions before work begins:
- What is the roof shape and where are the drainage lines?
- Which structural supports and connections are provided in the design?
- Where will chimneys, openings and other penetrations be located?
- How will the eaves, fascia boards and water-collection lines be formed?
- Which materials and details are compatible with the selected covering?
- How will safe access be provided for installation, checks and deliveries?
The supporting roof structure
The supporting structure forms the frame of a pitched roof. In many houses it is timber and includes elements that create the sloping planes and transfer loads to the load-bearing parts of the building. The specific arrangement is not the same on every project: it depends on the distances between supports, the roof shape, openings, architecture and structural solution.
Work on the structure requires precision from cutting through installation. Elements need to be placed according to the specified axes, levels and slopes, while the connections between them must provide system stability. Roof planes should be checked before the next layers are installed. If there is twisting, uneven spacing or a deviation along an eave or ridge line, the problem carries through to the membrane, battens and visible covering.
The structure is not merely support for roof tiles. It must account for the weight of the roof layers, weather effects and maintenance access, in line with the design. Special attention is given to areas around openings, chimneys, valleys and changes in geometry. These often include additional elements and more complex connections that should not be improvised on site.
After installation, it is sensible to carry out an intermediate inspection before the structure is covered. This includes a visual review of connections, straightness of the main lines, formation of the eaves and whether openings match the planned details. This check is valuable because access to the elements becomes limited after membranes and covering are installed.
Under-roof layers, ventilation and the supporting batten system
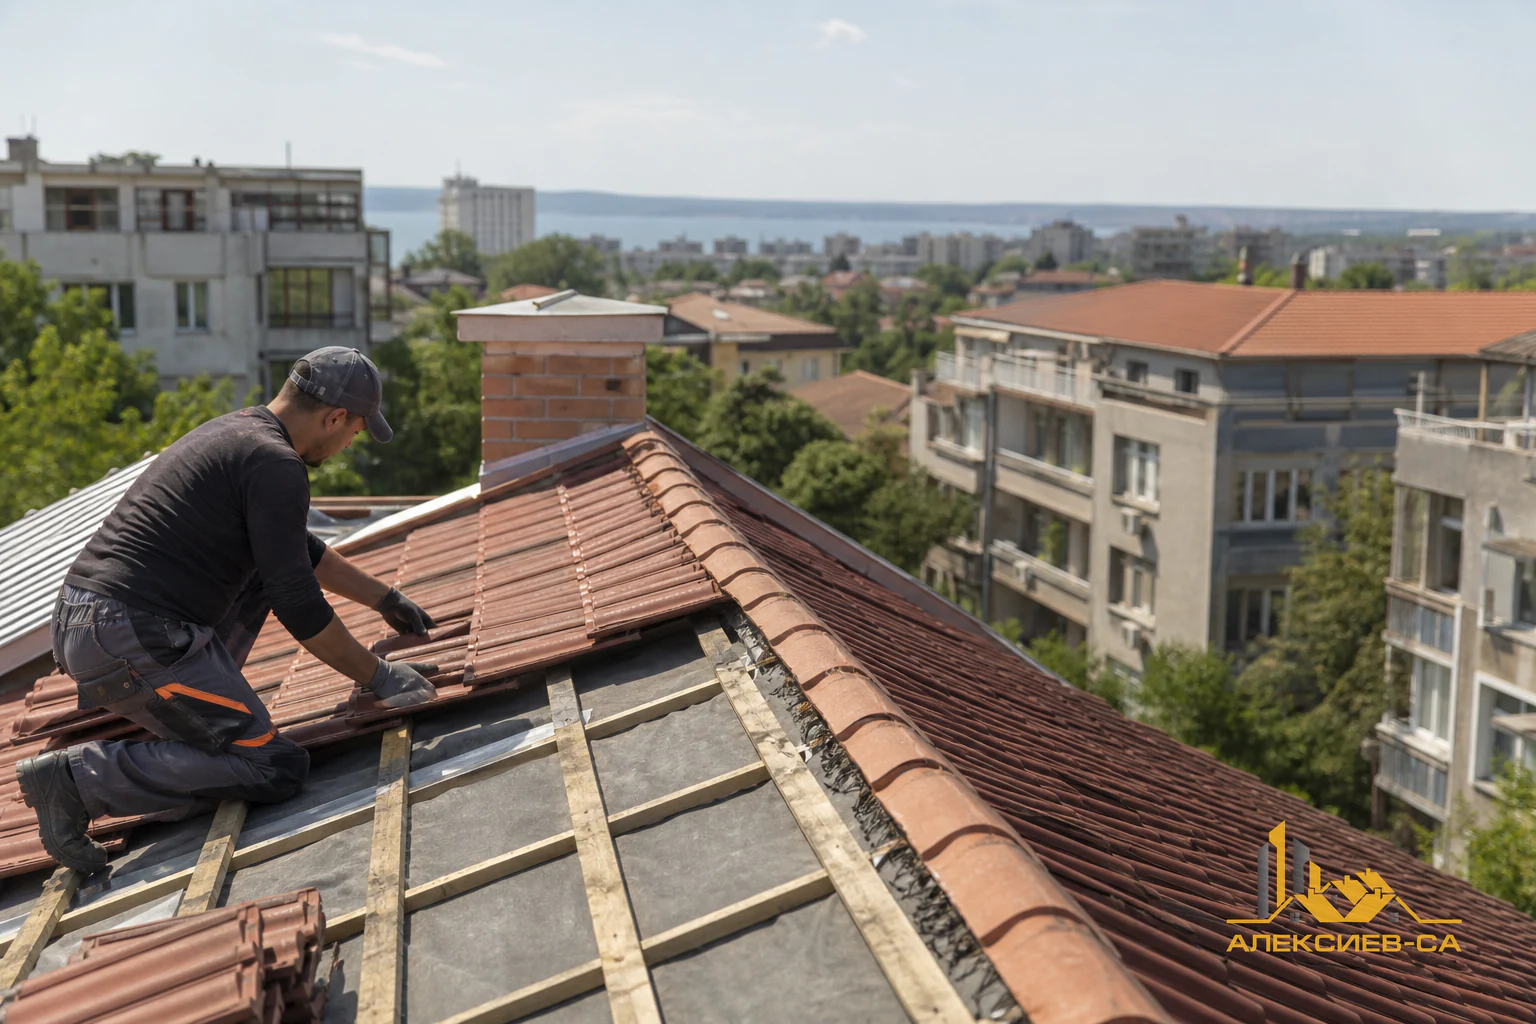
Above the structure, a sequence of layers is built to support roof protection and proper performance. In pitched roofs, the under-roof membrane has an important role. It is installed below the covering and provides additional protection if water or snow passes through joints, overlaps or under particular weather conditions. It does not replace the role of the tiles; it works together with them.
Installing the membrane requires the correct direction, overlaps and formation around interruptions. At ridges, eaves, valleys and penetrations towards chimneys, it is not enough simply to lay the material next to the adjoining element. Water needs a continuous and controlled route towards drainage, without pockets, open joints or locations where it can be retained.
Counter-battens generally form a space between the membrane and the battens. This supports ventilation below the covering and creates a route for moisture or water to drain towards the eaves. Battens are installed over them, and the roof tiles are arranged on the battens. Batten spacing and alignment must match the selected roof covering because they affect correct fixing and the even appearance of the rows.
For a roof with usable attic space or insulation placed from the inside, vapour-control, insulation and ventilation details need to be carefully coordinated with the entire roof system. Each layer has a different function: one limits water vapour coming from rooms, another improves thermal comfort and a third protects from outside while allowing ventilation. Mixing these functions or interrupting layers can create conditions for moisture in the structure.
| Element | Main function | What is checked before the next stage |
|---|---|---|
| Under-roof membrane | Additional protection below the covering | Overlaps, tension and a continuous route to the eaves |
| Counter-battens | Ventilated space and base for battens | Correct fixing and continuity along the slope |
| Battens | Supporting base for roof tiles | Spacing, levelling and compatibility with the covering |
| Ridge and eave | Entry and exit for airflow and water | Detail compatibility and free drainage |
Roof covering and completion of the roof planes
The roof covering is the visible protective layer that receives direct weather exposure. On a tiled roof, it involves more than laying the main tiles across the plane; it also includes forming ridges, edges, end rows and all transitions. Every system has a particular method of arrangement, overlap and fixing that must suit the slope and the specific roof details.
Installation begins on a properly formed and checked base. The first row at the eave matters for how water enters the gutter. Side rows and verge areas need protection from wind-driven rain and should finish neatly. At ridges, a detail is needed that both completes the meeting of two roof planes, protects against water ingress and allows the planned ventilation beneath the covering.
Valleys are among the most sensitive areas on multi-pitched roofs. They collect water from two adjoining planes and direct it towards the eaves. Because of the concentrated water flow, their base, flashing and the cutting of adjacent tiles must be executed precisely. Similar care is needed at connections between a pitched roof and a vertical wall, where water can be retained or driven in by wind.
Completing roof planes is not only an aesthetic task. Even row lines indicate good base geometry, but reliability also depends on invisible overlaps, fixings and connections. Before this stage is accepted, it is useful to inspect eaves, ridges, edges and areas around every interruption rather than viewing the roof only from a distance.
Flashings, chimneys and connections to walls
Flashings are elements that form weatherproof transitions where tiles alone cannot cover an area. They are needed around chimneys, roof windows, dormers, ventilation outlets, valleys, parapets and connections to vertical walls. These locations require attention because they combine different materials, changes in slope and interruptions in the regular roof plane.
Around a chimney, water running down from the upper part of the roof should not be stopped in front of its vertical wall. The detail must direct it to the sides and down onto the covering. Flashing connects with both the roof layers and the chimney surface while allowing for material movement and drainage. An incorrectly formed or interrupted transition can let in water even when the main roof tiles are in good condition.
The principle is similar at a connection with a vertical wall: water from the roof must be directed away without an open route behind the flashing. It is important to consider this detail together with the façade solution rather than as a later addition. If different teams work without coordination, interrupted layers, awkward joints or difficult-to-maintain areas may remain.
Gutters, downpipes and water control
Drainage completes the work of the roof system. Gutters receive water from the eaves, while downpipes direct it to the planned location around the building. If this route is not organized well, water can overflow over fascia areas, wet the façade, collect close to the foundations or cause inconvenience around entrances and terraces.
During installation, the line and slope of gutters, the placement of outlets, the connections between individual parts and the stability of fixings are checked. Downpipes need to be coordinated with the façade, access routes and site drainage. Their locations are not determined only by installation convenience; they should receive water from the relevant roof area and guide it safely downward.
The eave is the transition between roof layers, the covering and the drainage system. Here, it is checked that water from both the membrane and the tiles can reach the gutter without falling behind it or onto the façade. Although it is a small-looking detail, this area connects several systems and directly affects building performance during rainfall.
After roof completion, it is sensible to carry out an overall review that includes:
- the condition and alignment of eaves, ridges and edges;
- continuity of flashings around chimneys, walls and openings;
- formation of valleys and the absence of visible obstacles to water;
- the connection between covering, membrane and gutters;
- fixing of gutters and downpipes;
- cleanliness of drainage elements from construction debris.
Sequence, coordination and acceptance of the stage
The roof usually follows rough construction and masonry, but its completion affects many later activities. Once the building is reliably protected from above, interior work can be organized in better conditions. Even so, the roofing stage must be coordinated with chimneys, future installations, the façade, insulation of the attic space and drainage around the building.
A good sequence separates work into clear control points: readiness of the supporting base, installation and checking of structural elements, laying under-roof layers, forming the batten system, installing the covering, then details and drainage. Owners do not need to control technical execution instead of specialists, but it is helpful to know when a layer will be concealed and which decisions must be clarified before that happens.
When accepting the stage, ask for the critical details and the way they were resolved to be explained. A roof walk-through from safely accessible locations and a review of photographs from intermediate stages can provide a better understanding of hidden layers. It is especially useful to have clarity about maintenance: how access to gutters is provided, which areas should be watched after strong wind or rain, and how drainage elements should be kept clean.
For owners in Varna and the region, the topic of details is particularly practical because a roof is continuously exposed to changing weather, rainfall and wind. Not every project has the same conditions, but careful drainage design, stable fixing and inspection of transitions are a sensible foundation for every new roof.
Planning a new roof construction project?
Contact ALEKSIEV-SA for an inspection, project discussion and a specific quotation for a roof in Varna and the region.
Frequently asked questions
Frequently asked questions
What are the main stages of building a new roof?
The usual process begins with reviewing the design solution and the readiness of the base. It continues with the supporting structure, under-roof layers, counter-battens and battens, the roof covering, flashings and the drainage system. Intermediate checks are important because some elements are concealed by the layers that follow.
Are roof tiles enough to protect a house from leaks?
No. Tiles are the main external layer, but a roof also relies on an under-roof membrane, correctly formed overlaps, a batten system, flashings and drainage. Leaks often occur at chimneys, valleys, eaves or wall connections, where water is not controlled by the main tiles alone.
Why is the under-roof membrane important?
The under-roof membrane provides additional protection beneath the covering against accidental entry of water, snow or dust. It must be installed with correct overlaps and a continuous route towards the eaves. The membrane does not replace the tiles; it complements the work of the complete roof system.
Which details around chimneys and walls require the most attention?
Chimneys, dormers, roof windows and connections to vertical walls need precise flashings. They must guide water around the obstruction and back onto the covering without open joints or retention areas. These transitions should be clarified in advance rather than after the roof tiles have been laid.
What is the role of gutters and downpipes?
Gutters collect water from the eaves, and downpipes guide it in a controlled way downwards. They protect the façade and limit water collection immediately next to the building. It is important to check the slope, fixings, connections and the clear route of water from the roof covering to the drainage system.
What should be checked before accepting a new roof?
Check whether eave, ridge and edge lines are aligned, whether all flashings are complete and whether valleys and gutters are clean and properly formed. Request information or photographs from hidden stages, including the structure and membrane. It is also useful to know how access will be provided for future cleaning and periodic inspection.